Contributing to Documentation
Documentation#
As with the other parts of Unikraft, we welcome contributions to the documentation repository.
Documentation is written using MDX, since it make it easy to use JSX components.
We follow the GitHub flow for contributions. Submit new content, corrections and improvements to documentation as pull requests (PRs) that we will then review and approve in the documentation. You can add entire sections if you think a topic is missing or update existing ones with missing information.
You can also open up an issue to signal a problem or a missing part in the documentation that you request someone to fix.
We use English as the documentation language. Please proofread your text before submitting a pull request.
Write each sentence on a new line, since it make the content easy to review and modify. This way, changing one sentence only affects one line in the source code, and it is easier to follow the content and the reviewes.
Prefer using the 1st person plural for consistency across the entire repository. Use phrases like "we run the command / app", "we look at the source code", "we provide support".
Content Layout#
The content has the following structure:
content|-- blog/ # Blog posts, <date>-<blogpost title>.md|-- community/ # Community related content (events, general information, etc.)|-- docs/ # Unikraft documentation, split by categories into subdirectories|-- guides/ # Short and on point guides, good for getting started|-- hackathons/ # Hackathon landing pages|-- imprint.md|-- privacy.md`-- releases/ # Unikraft releases summaries
Testing Changes#
Before you submit your changes for review, please make sure you have tested them thoroughly.
You can build and deploy the site locally, following the instructions below.
You can also validate your changes for common issues using the super-linter, following the instructions below.
Please also do a spell check on your changes.
Most text editors should be able to do that by themselves, here's how you do it in Vim.
Building the Website#
You can build the website inside a Docker environment or natively. Building inside a Docker environment is strongly recommended, since you will work in the same environment as the deployed website.
Building the Website Inside a Docker Environment#
You can build the site inside a Docker environment. For this, you will need to install Docker-CE. You can do that by following the instructions here, or by running:
curl -fsSL https://get.docker.com/ | sh
Building the site inside a Docker environment is highly recommended, since you will work in the same environment as the deployed site, so there will be no errors regarding packages version or filesystem layout.
To deploy the site, run (in the directory of the repository clone):
docker build -t ghcr.io/unikraft/docs:base --target base .docker run -it --rm -v $(pwd):/docs -w /docs -p 3000:3000 --entrypoint sh ghcr.io/unikraft/docs:base# The commands below should be used in the docker containeryarn installyarn run dev
You may need admin privileges to run the first 2 commands. Open up your browser and point to http://localhost:3000 to check the deployed documentation website.
Building the Website Natively#
You can also build the site natively.
For a native build, you need to install node.
You can do it by following the instructions here.
This may lead to errors due to different
nodeversions or other environment problems. These problems can be avoided by building the website inside a Docker environment.
Then, to build and deploy the site, run:
yarn installyarn run dev
As above, open up your browser and point to http://localhost:3000 to check the deployed documentation website.
Using the Linter#
To automate a big part of the reviewing process, we use the super-linter on the docs repository.
It runs as a GitHub action on every time you do a push, checking all the changed files.

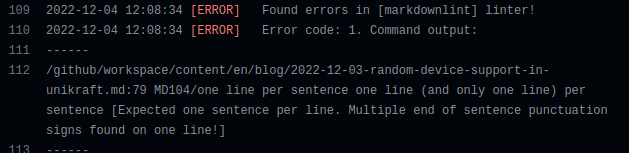
If you click on Details, you can see the full linter output.
The most relevant part is under the Lint Code Base section, where you can find the full error messages and the line that generated the error.
Since the linter checks the entire file, you may find yourself with a lot of errors from lines that you did not modify. Please make sure that the errors are not caused by the lines that you added or modified. If you have the time to add a commit to your pull request, that fixes all the linting errors within the modified files, we will be forever grateful 🙏
Running the Linter Locally#
You can also run the linter locally, before creating the pull request.
super-linter is actually a collection of linters;
for a local run, you need to install and then run the required linters.
For the Unikraft documentation repository, used and useful linters are:
To run the super-linter locally, follow the instructions from here.
Note that this will require quite a lot of storage, since it will pull the super-linter Docker image.
You will need to install Docker, following the official documentation. After that, pull the latest container by running:
docker pull github/super-linter:latest
To run the super-linter on a given directory, use a command similar to:
docker run -e RUN_LOCAL=true -e USE_FIND_ALGORITHM=true -v /path/to/directory/to/check:/tmp/lint github/super-linter
This will start a docker container that will run the super-linter checks on the given directory:
--------------------------------------------------------------------------------2022-12-29 07:50:55 [INFO] ---------------------------------------------2022-12-29 07:50:55 [INFO] --- GitHub Actions Multi Language Linter ----2022-12-29 07:50:55 [INFO] - Image Creation Date:[2022-12-26T16:46:33Z]2022-12-29 07:50:55 [INFO] - Image Revision:[154522b380449499473f75d46f3796e23ebc1d2e]2022-12-29 07:50:55 [INFO] - Image Version:[154522b380449499473f75d46f3796e23ebc1d2e]2022-12-29 07:50:55 [INFO] ---------------------------------------------2022-12-29 07:50:55 [INFO] ---------------------------------------------2022-12-29 07:50:55 [INFO] The Super-Linter source code can be found at:2022-12-29 07:50:55 [INFO] - https://github.com/github/super-linter2022-12-29 07:50:55 [INFO] ---------------------------------------------2022-12-29 07:50:55 [INFO] --------------------------------------------[...]
A sample run, while in the root directory of this documentation repository, is:
docker run -e RUN_LOCAL=true -e USE_FIND_ALGORITHM=true -v $(pwd)/content/docs/contributing/:/tmp/lint/ github/super-linter
You can also run each linter separately, since it will require less storage space.
To run the linters, you will need to install the markdown-cli, textlint and jscpd tools:
npm install markdownlint-clinpm install textlintnpm install jscpd
Note that it's likely that these linters require a more recent version of node than the default package installation.
Install the most recent one using nvm.
First, install nvm using the instructions here.
Then install the most recent version of node and follow the instructions:
nvm install node# Follow instructions shown by the above command.nvm use nodenode --version # Check node version.
The textlinter will require installation of rules.
You can find a list of rules here.
npm install textlint-rule-terminologynpm install textlint-rule-no-todo
Use the linters with npx from the documentation directory:
npx markdownlint --config .github/workflows/config/config.json --rules .github/workflows/rules/rules.js path/to/markdown/file.mdxnpx textlint --config .github/workflows/.textlintrc --rule <rule-name> path/to/markdown/file.mdxnpx jscpd <path> # Typically a directory
For example:
npx markdownlint --config .github/workflows/config/config.json --rules .github/workflows/rules/rules.js content/docs/contributing/*.mdx
_index.md:14:187 MD033/no-inline-html Inline HTML [Element: a]blog-case-studies.mdx:10 MD012/no-multiple-blanks Multiple consecutive blank lines [Expected: 1; Actual: 2]code-of-conduct.mdx:69 MD104/one line per sentence one line (and only one line) per sentence [Expected one sentence per line. Multiple end of sentence punctuation signs found on one line!]code-of-conduct.mdx:82:1 MD007/ul-indent Unordered list indentation [Expected: 0; Actual: 1]code-of-conduct.mdx:85:1 MD007/ul-indent Unordered list indentation [Expected: 0; Actual: 1][...]
npx textlint --config .github/workflows/.textlintrc content/docs/contributing/code-of-conduct.mdx
[...]/docs/content/docs/contributing/code-of-conduct.mdx61:66 ✓ error Incorrect usage of the term: “e-mail”, use “email” instead terminology✖ 1 problem (1 error, 0 warnings)✓ 1 fixable problem.Try to run: $ textlint --fix [file]
npx jscpd content/docs/contributing/code-of-conduct.mdx
+--------------------------------------------------------------------------------------------------------------+| Format | Files analyzed | Total lines | Total tokens | Clones found | Duplicated lines | Duplicated tokens ||----------+----------------+-------------+--------------+--------------+------------------+-------------------|| url | 1 | 4 | 28 | 0 | 0 (0%) | 0 (0%) ||----------+----------------+-------------+--------------+--------------+------------------+-------------------|| markdown | 1 | 130 | 1470 | 0 | 0 (0%) | 0 (0%) ||----------+----------------+-------------+--------------+--------------+------------------+-------------------|| Total: | 2 | 134 | 1498 | 0 | 0 (0%) | 0 (0%) |+--------------------------------------------------------------------------------------------------------------+Found 0 clones.Detection time:: 41.945ms
Running the URL checker#
When new additional material is added, it's a good practice to run a URL checker on the new pages that have been added.
You can use any tool you find easy to setup or use, Below are two examples:
Using linkchecker:
$ pip install linkchecker$ linkchecker http://localhost:3000/docs/new-entry -r 1 # -r 1 limits the check to just the url given...URL `docs/broken-url'Name `baby-steps'Parent URL http://localhost:3000/docs/contributing/docs, line 127, col 28Real URL http://localhost:3000/docs/contributing/docs/broken-urlCheck time 4.030 secondsResult Error: 404 Not Found
Using lychee:
$ lychee content/docs/path/to/new-entry # lychee can run checks on our files directly$ lychee http://localhost:3000/docs/new-entry # and can be run against our local development website$ lychee --offline content/docs/contributing/docs.mdx # --ofline limits the checks to just our local files instead27/27 ━━━━━━━━━━━━━━━━━━━━ Finished extracting links Issues found in 1 input. Find details below.[content/docs/contributing/docs.mdx]:✗ [ERR] file:///.../unikraft/docs/content/docs/contributing/docs/broken-url | Failed: Cannot find file🔍 27 Total (in 1s) ✅ 26 OK 🚫 1 Error
Pre-built binaries can be found on the release page.
For example, to install and extract the binary built for Linux:
$ pushd /tmp$ curl -OL https://github.com/lycheeverse/lychee/releases/download/v0.14.3/<release>.tar.gz$ tar -xf <release>.tar.gz # this would create a `lychee` binary in our current directory$ mv ./lychee ~/.local/bin # we place the binary in our local home dir path$ popd
The above assumes we have already configured our default shell to include ~/.local/bin in the PATH by already having export PATH=$PATH:~/.local/bin defined in our ~/.bashrc or ~/.zshrc, depending on the default shell set.
We can also place the binary in our working project directory and call it from there ./lychee or anywhere on the filesystem, assuming we provide the full path to it.
Limitations:
Url checkers will not catch all broken references, for example, an empty url block [foobar](#) or a section that does not exist within our file [foobar](#foo-section) (better detected with the markdown linter), but they can help eliminate some cases like typos or moved content.
Reviewing Changes#
If you are assigned as a reviewer to a pull request (PR), please follow the testing steps and make sure everything looks good.
The review may go through a set of back-and-forth steps between the author and the reviewer before the reviewer marks the PR as approved.
As a reviewer, when you consider the process complete, you must add a signature, in the same way that the author has.
This is done by writing adding a Reviewed-by line as part of your approval message in the GitHub review interface:
Reviewed-by: Your Name <your@email.com>
Connect with the community
Feel free to ask questions, report issues, and meet new people.